
Application – Income tab
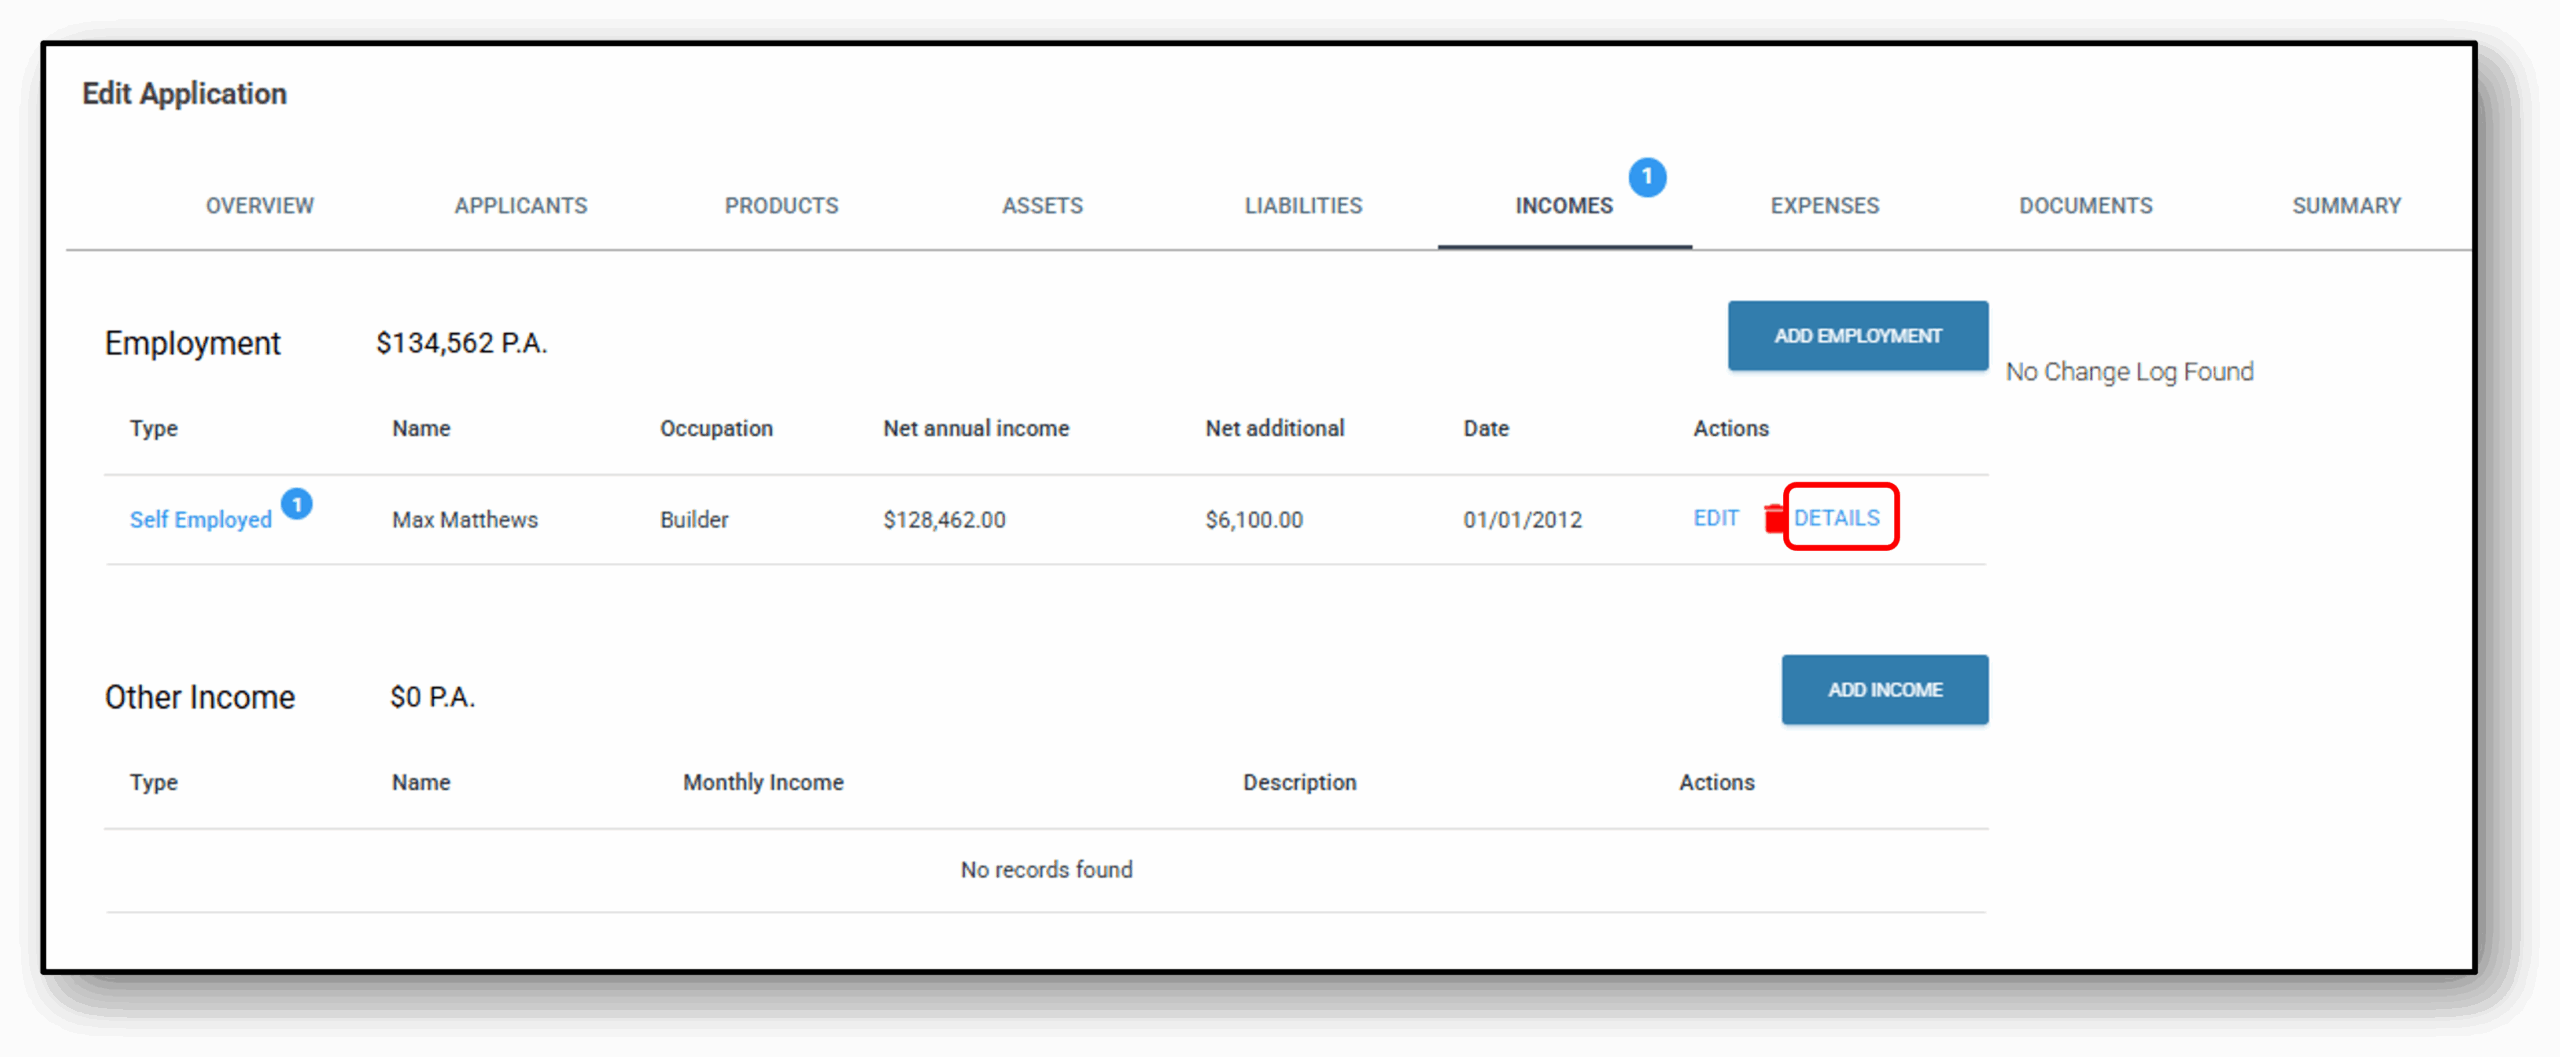
The Income tab allows you to view, add or edit the income declared by the customer.

![]()
1. Add Employment
When an Applicant is added to the application either for the 1st time or as an additional applicant, their employment and income will need to be entered. When entering an applicant, there are four categories of employment that can be added for a customer:
- Employee (PAYG)
- Self Employed
- Unemployed
- Retired
The questions that follow relate specifically to the ‘Primary Employment Type‘
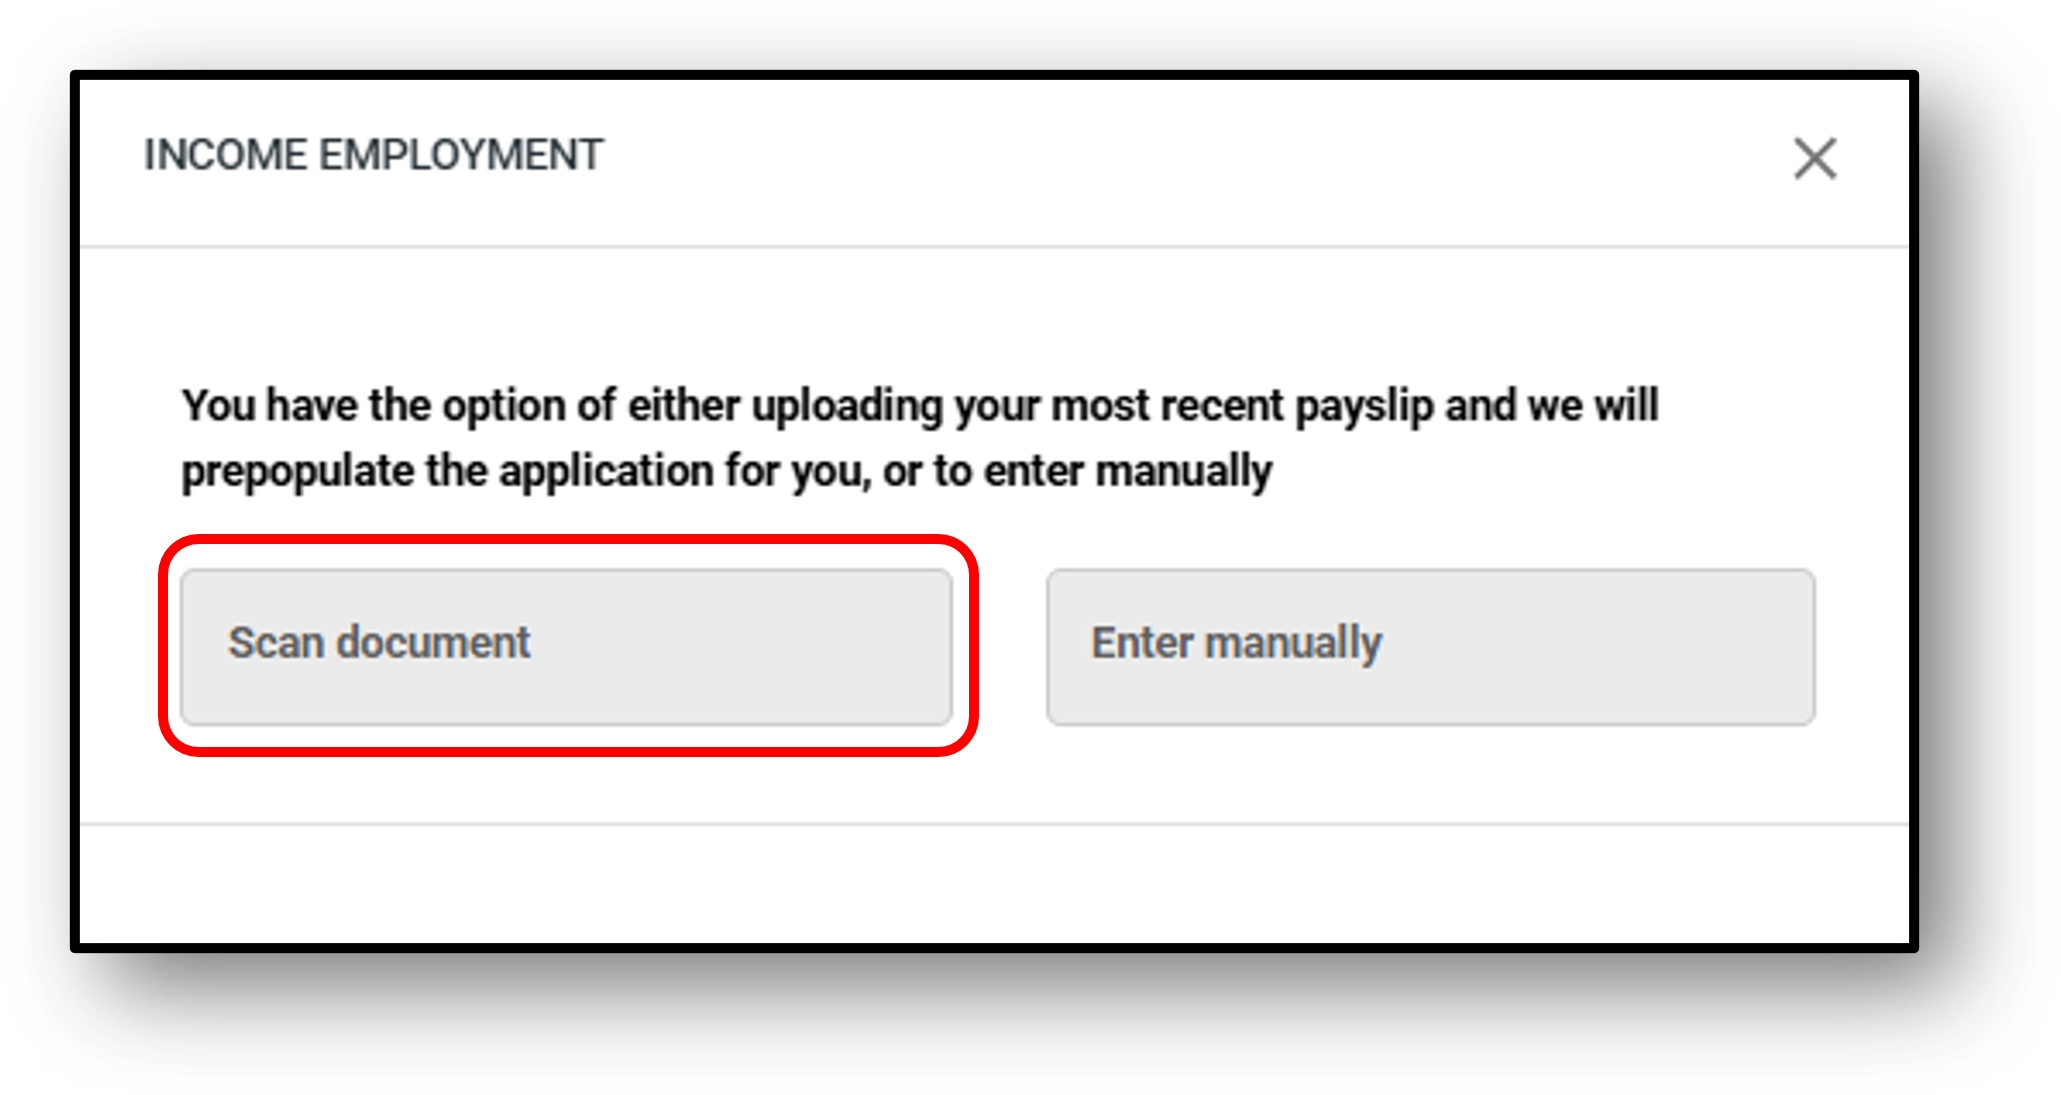
The user also has the option of uploading the most recent payslip which will prepopulate the application as per the below images:
Step 1: Select ‘Scan document‘
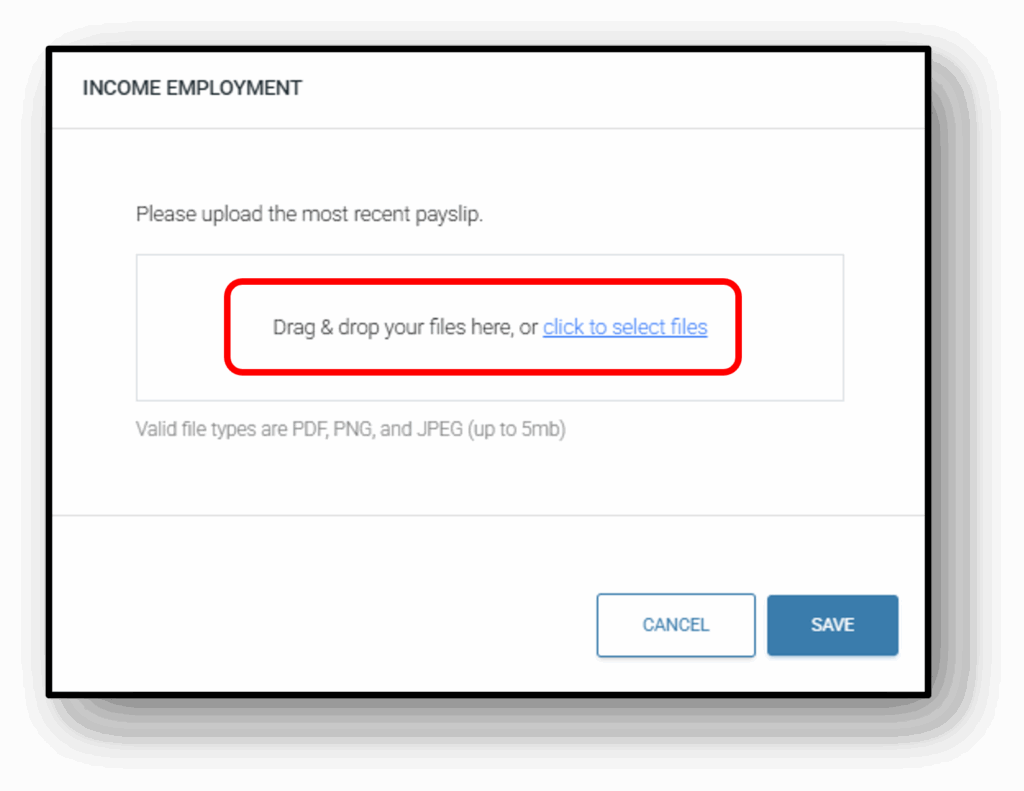
Step 2: Either drag & drop your payslip in the designated area or ‘click to select files’
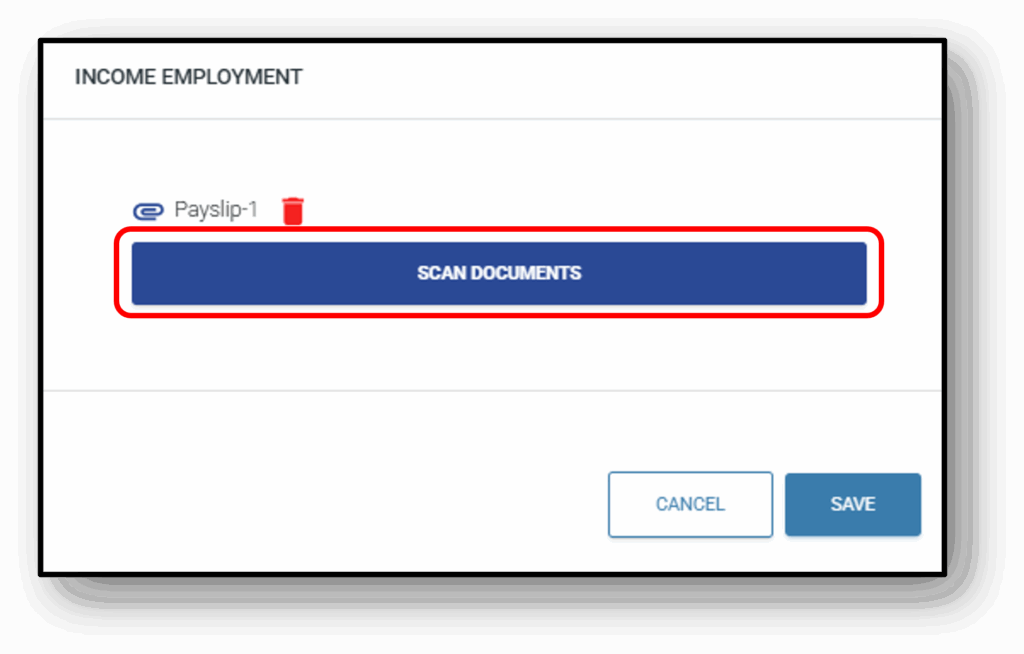
Step 3: Press ‘Scan Documents’
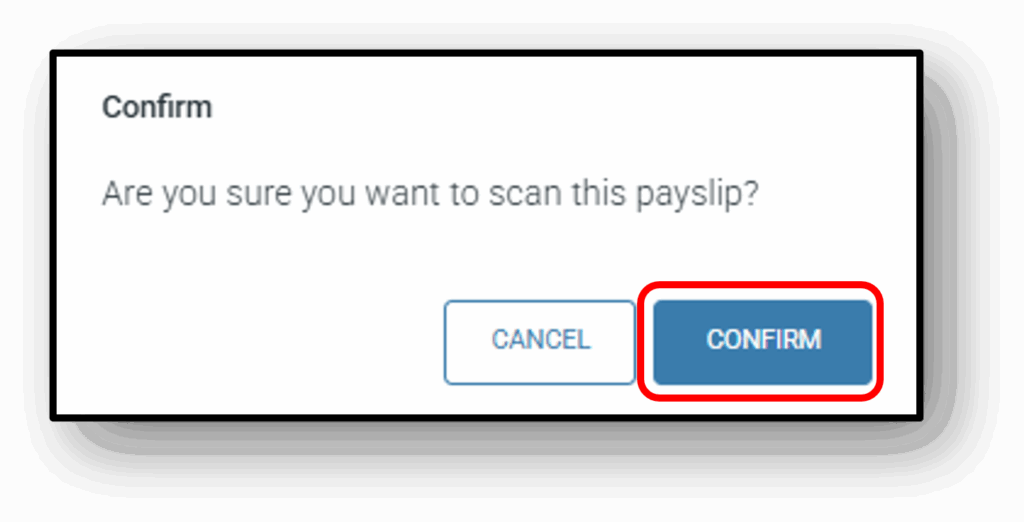
Step 4: The user will be asked for one last confirmation before proceeding
Step 5: The applicants employment and income details will be prepopulated as per below

2a. Employment Type - PAYG
When adding the employment type Employee (PAYG) income for either an existing applicant or an additional applicant, the user will be asked to provide the following information
Below is a list of the editable options for Employee (PAYG):
- Primary employment basis
- Full-time
- Part-time
- Contract
- Temporary
- Casual
- Commission only
- Primary employment occupation
- ANZSCO 2022 occupation code
- Employers company name
- Employers contact phone number
- Employers Address
- Primary gross income (salary)
- Income period
- Annual
- Month
- Fortnight
- Weekly
- Net annual income
- Net annual income from bank statement
- Gross annual additional income (bonus, commission or overtime)
- Net annual additional income
- Primary employment commencement date
- Previous employers company name
- Previous primary employment commencement date
- Attach last 3 payslips
2b. Employment Type - Self Employed
When adding the Self employed income for either an existing applicant or an additional applicant, the user will be presented with the applicants employment section of the form to edit.
Below are a list of the editable options for Self Employed:
- Primary employment basis
- Full-time
- Part-time
- Contract
- Temporary
- Casual
- Commission only
- Entity type
- Sole Trader
- Company
- Partnership
- Company/Business Name
- ABN/ACN
- When was the business established?
- Primary employment occupation
- ANZSCO 2022 occupation code
- Business contact number
- Business Address
- Average annual taxable income over the past two years
- Income period
- Annual
- Month
- Fortnight
- Weekly
- Net annual income from bank statement
- Gross annual additional income (bonus, commission or overtime)
- Attach last 2 years financials
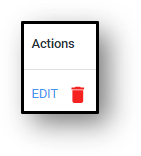
3. Actions/Edit (Existing Employment Income)
The employments types that can be edited are:
- Employee (PAYG)
- Self-Employed
1. When editing an Employee (PAYG) income for either an existing applicant or an additional applicant, click on the ‘Edit‘ button and you will be presented with the Applicant section of the form to edit.
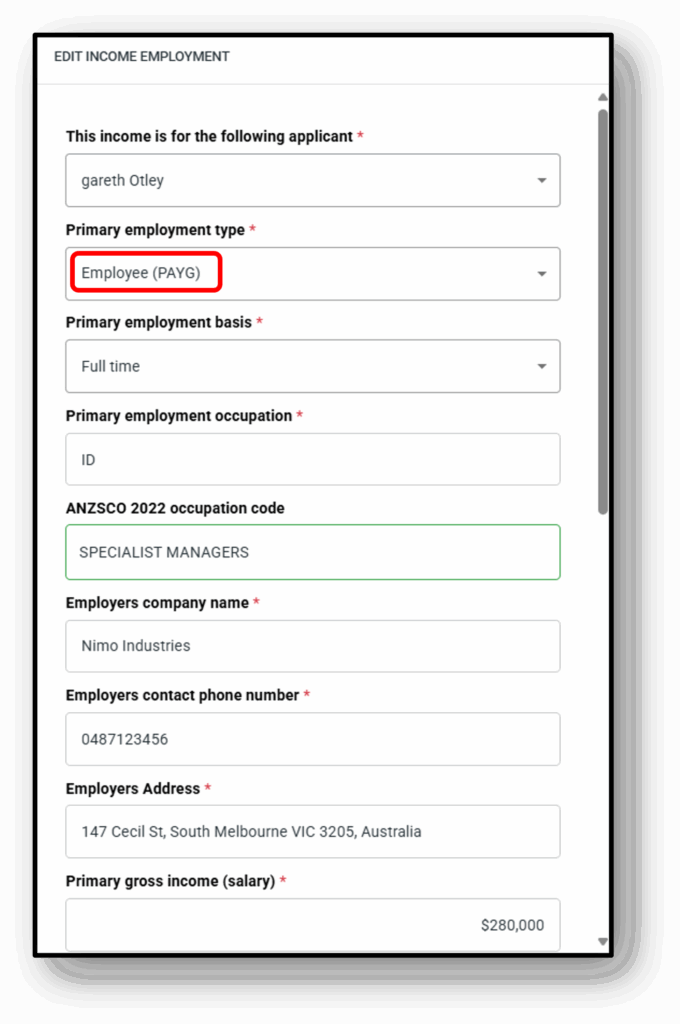
2. When editing the Self employed income for either an existing applicant or an additional applicant, click on the ‘Edit‘ button and you will be presented with the Applicant section of the form to edit.
4. Details
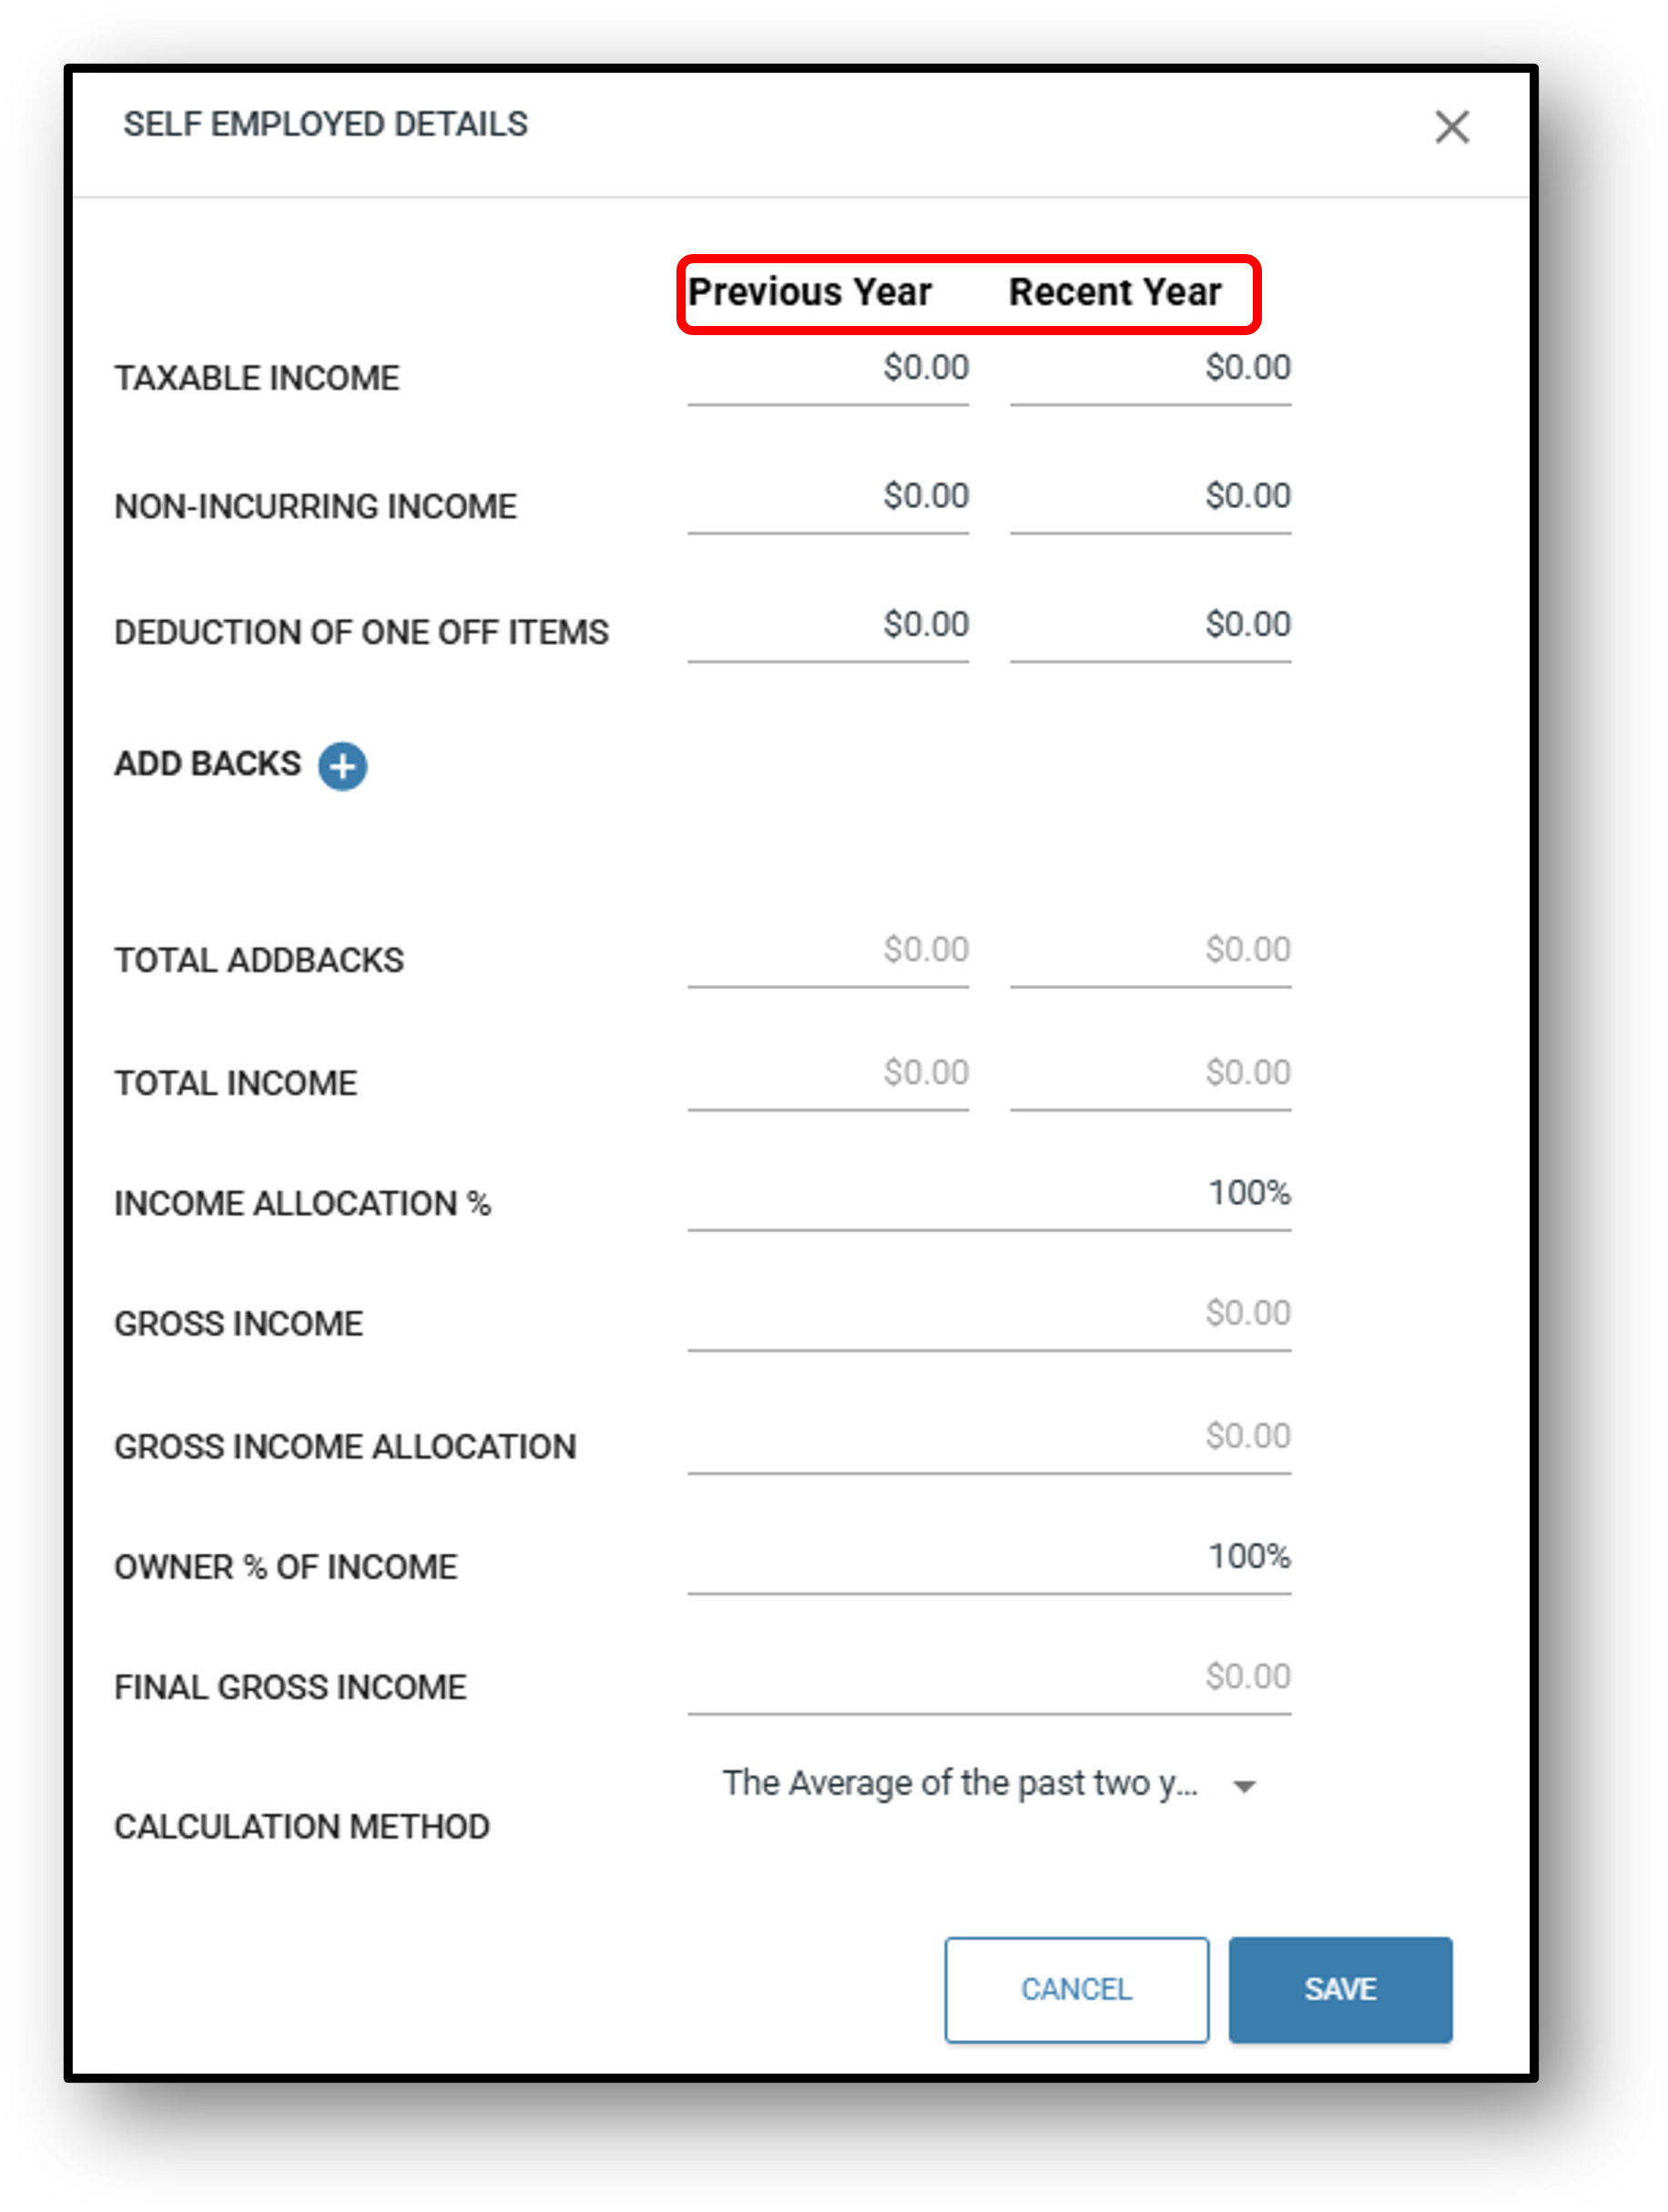
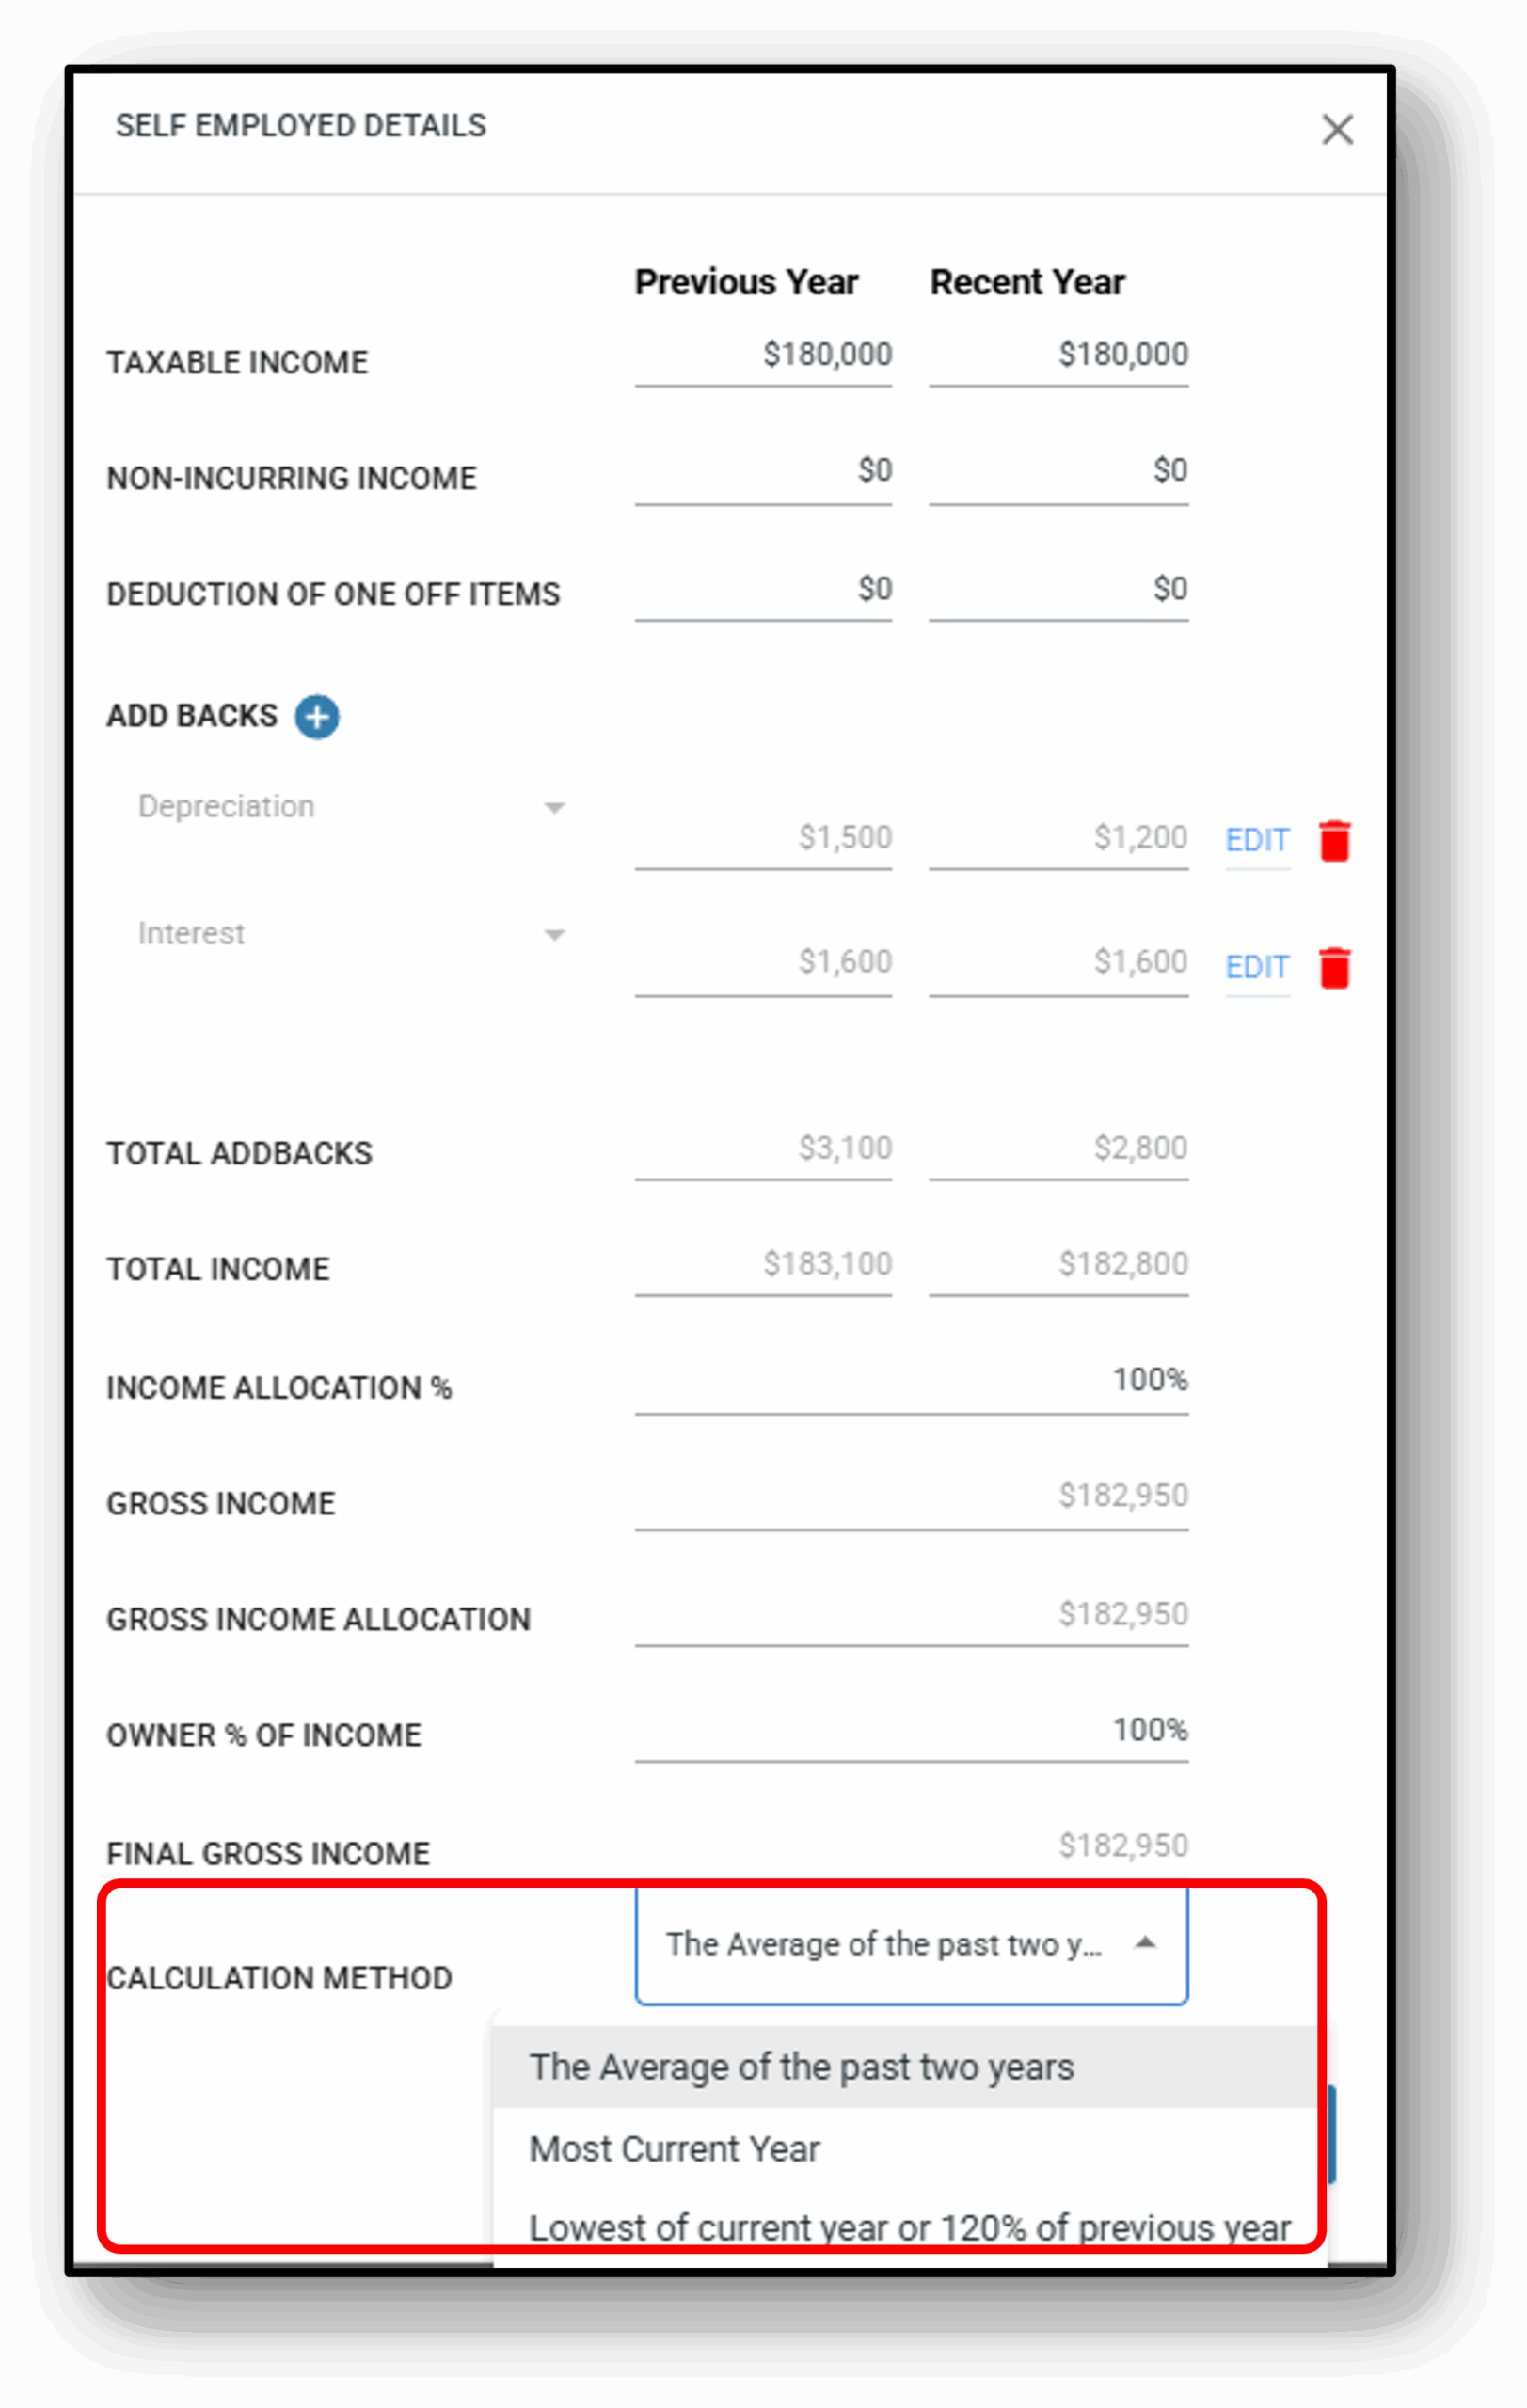
Self employed – Addbacks
Addbacks can only be included for self-employed applicants.
Click on the hyperlinked “Details‘ to open the self-employed details section.
The following pop-up will appear:
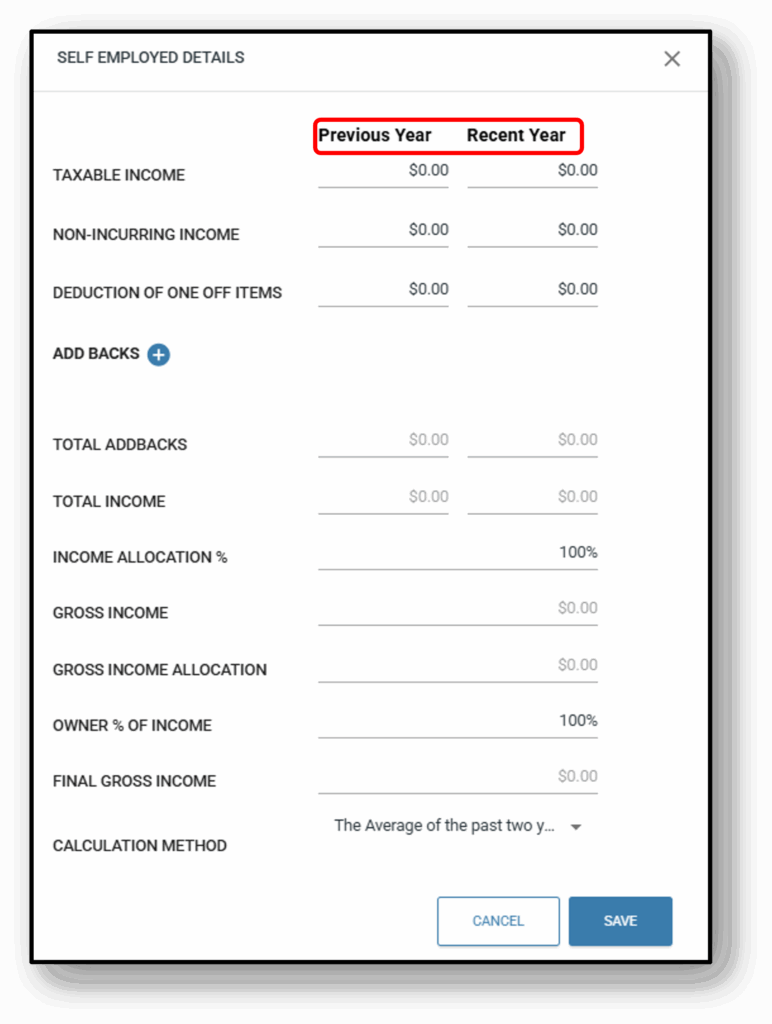
Once populated, be sure to choose calculation method. Income will then be updated to include addbacks etc.
5. Add Income Other
When entering Other Income for an applicant, there are 26 categories of ‘other income’ types that can be added for a customer:
- Interest Income
- Investment
- Property Rental
- Property Rental (net)
- Pension
- Family Allowance
- Foreign Sourced
- Superannuation
- Superannuation (Gross)
- Work Allowance
- Workers Compensation
- Child Support/Maintenance
- Carer Payment
- Family Allowance Tax A & B
- Rental Assistance
- Disability Income
- Salary Continuance Insurance Payments
- Maternity Leave Income
- Site Allowance
- Other
- Other (gross)
- Short Term Rentals
- Government Benefit
- Car Allowance
- Company Car
- Commercial Rental Income
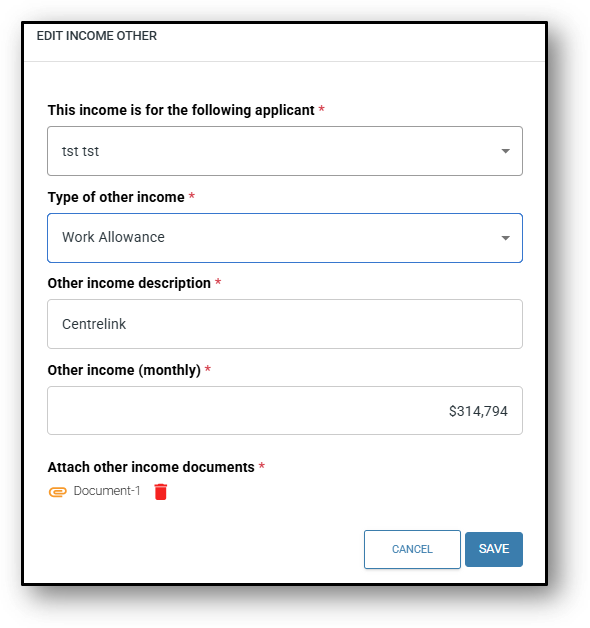
6. Actions/Edit (Existing Other Income)
1. When editing Income Other for either an existing applicant or an additional applicant, click on the ‘Edit‘ button and you will be presented with the Other Income section of the form to edit.
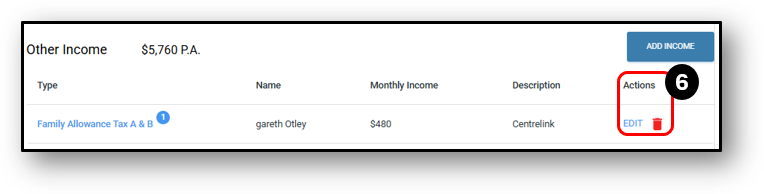
2. Edit the required details and save. A change log will be created.
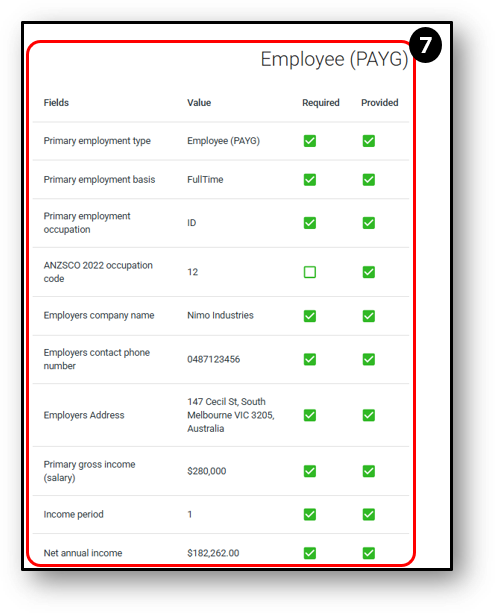
7. Required/Provided
This section displays the applicant’s responses to the loan application form, specifically in relation to the loan product. The user can edit each individual question on the form, and you can also choose between making the question ‘required’ or ‘optional’ for the customer to answer.
- Required – shows whether a question is mandatory. If this field is checked, then the ‘Provided‘ field must be completed, otherwsie it will spawn a blue bubble indicating something is still required. If the required box is unticked, it is optional for this to be provided.
- Provided – shows whether the applicant has answered the question.
- Colour Indicators –
- If both fields are green, it means all mandatory questions have been answered.
- If either field is red, it indicates that required details are still missing.
If the lender decides to make an exception for one of the application requirements within a tab, they can click on the item type that has an outstanding item and uncheck the “required” checkbox for the question that is causing the item to be outstanding.
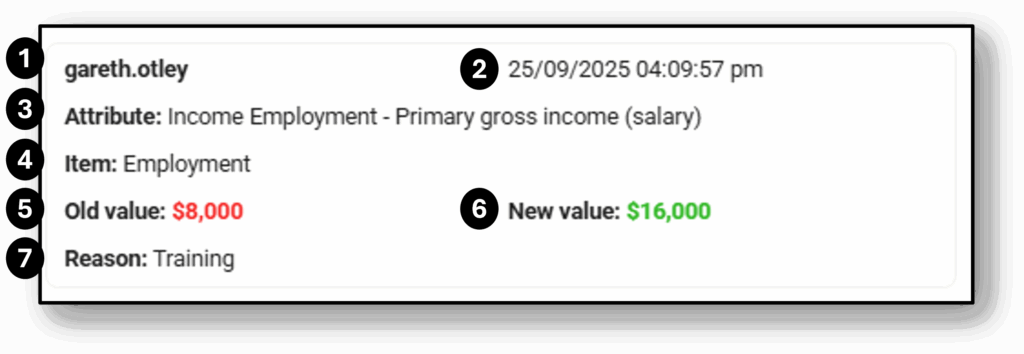
Change log
All changes made by the user will be recorded in the change log for tracking and audit purposes. The details recorded in the change log are as follows:
- The User that made the change
- The Date & Time of the change
- The Attribute that was changed
- The Item that the attribute belongs to
- The previous value before the change, the Old Value (appears in red)
- The new value after the change, the New Value (appears in green)
- The Reason for the change if it’s been provided
![]()