
Servicing – Transaction History tab
This tab provides an Historical Transaction of your customers core banking for their servicing needs.

![]()
1. New Transaction
To make a new manual transaction, click on the ‘New Transaction’ button as below. You’ll then be presented with the dialog box to confirm the transaction specifics.
Step 1: Click on new transaction
![]()
Step 2: Type the amount of the new transaction
![]()
Step 3: Click on the drop-down arrow in the Transaction Category field and choose the category type from
- Credit
- Debit
- Notification
Step 4: Click on the drop-down arrow in the new field Transaction Type and choose the type of transaction. The following options are available:
| CREDIT | DEBIT | NOTIFICATION |
| Annual Repayment | Annual Fee | Rate Change |
| Deposited Funds | Delinquency Fee | Rate Set |
| Interest Repayments | Funds Credited to Customer | |
| Lease Repayment | Loan Establishment Fee | |
| Loan Repayment | Loan Interest | |
| Miscellaneous Payment | Monthly Accrued Interest | |
| Other Repayment | Monthly Fee | |
| Payout & Close (Direct Debit) | Mortgage Discharge Fee | |
| Refund – Interest/Fee | Mortgage Registration Fee | |
| Refund to Customer |
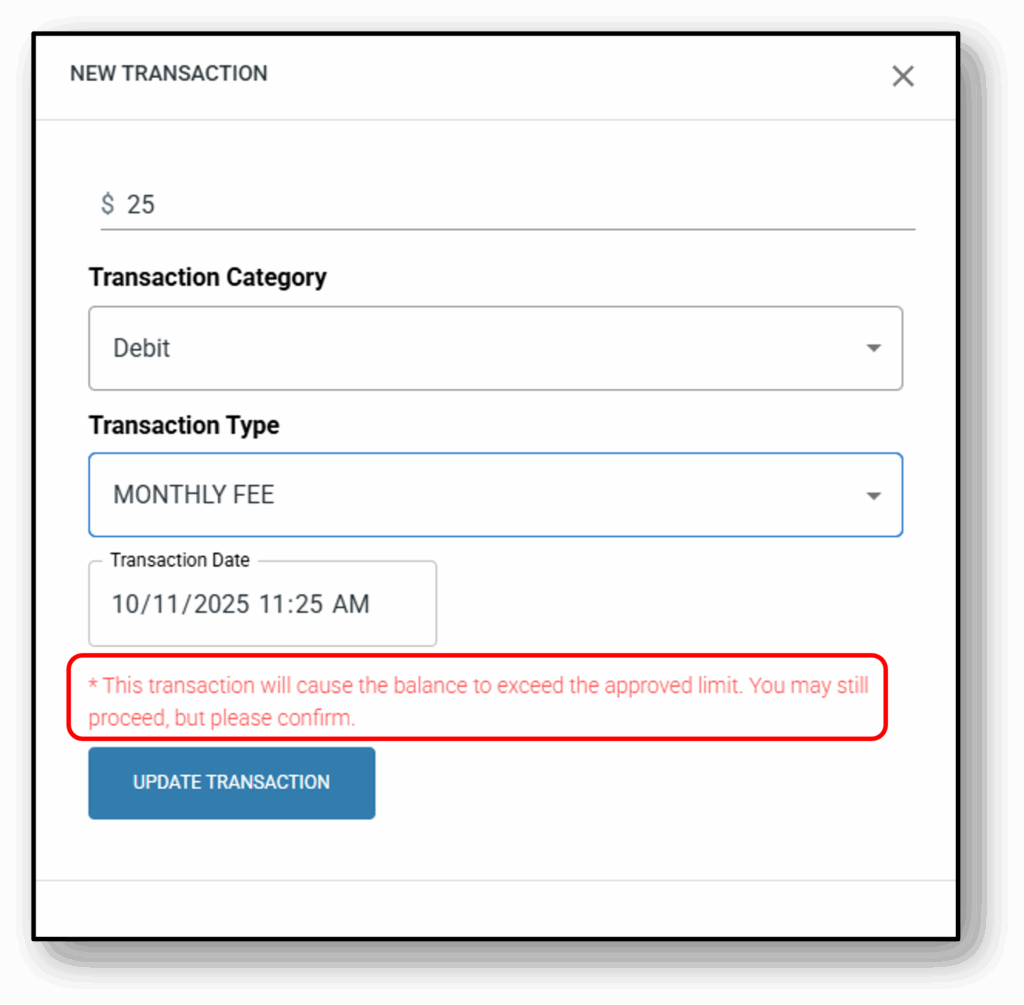
Step 5: Confirm you are happy with the transaction date and time.
![]()
Note: You can backdate the transaction as long as it’s within the same month.
2. Transaction List
The transactions will appear as rows up to 25 (which can be changed down the bottom right – 10, 25, 50 or 100). The column headers are as follows:
- Date
- Transaction ID (unique transaction identifier)
- Category (Description of the transaction)
- Debit (Amounts will always be preceded with a minus symbol to indicate they have been subtracted off the balance)
- Credit (will always bee a positive amount that reduces the balance)
- GST (10%) – Where applicable (Some fees will also include GST)
- Total Paid
- Balance
- Action (rubbish bin icon to delete the transaction if required)
![]()
![]()
Frequently Asked Questions
1. Can you make a manual transaction that will exceed the loan limit?
Yes you can exceed the approved limit. Prior to doing so, you will receive a warning message.
2. How do I change the interest rate for a customers loan?