Application – Balance Sheet tab

(Commercial use only)

This tab provides a Balance Sheet, same as Profit & Loss, retrieved data from scanning an uploaded pdf, which displays the data related to Equity, Asset and Liabilities of a business.

Image of the applicants tab

1. Add Assets

Users can add assets for the business (Sole Trader, Partnership, Company) by clicking the blue ‘Add Assets’ button.  Initially there will be two questions to answer (Aggregation and Asset Type) and this will expand further depending on the asset being added. To help with pre-population and documents scraping, the user will be asked to upload the relevant supporting document.

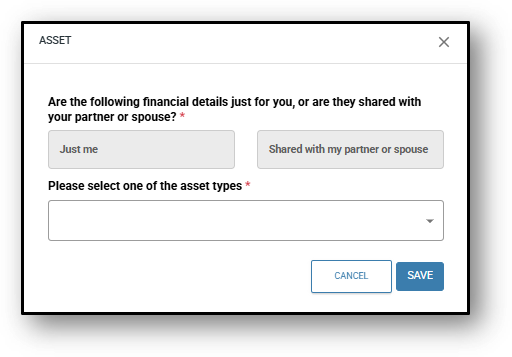
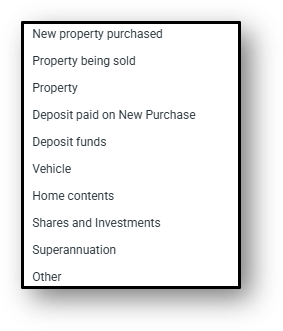
The user can then select from the following asset types:

2. Tax Years

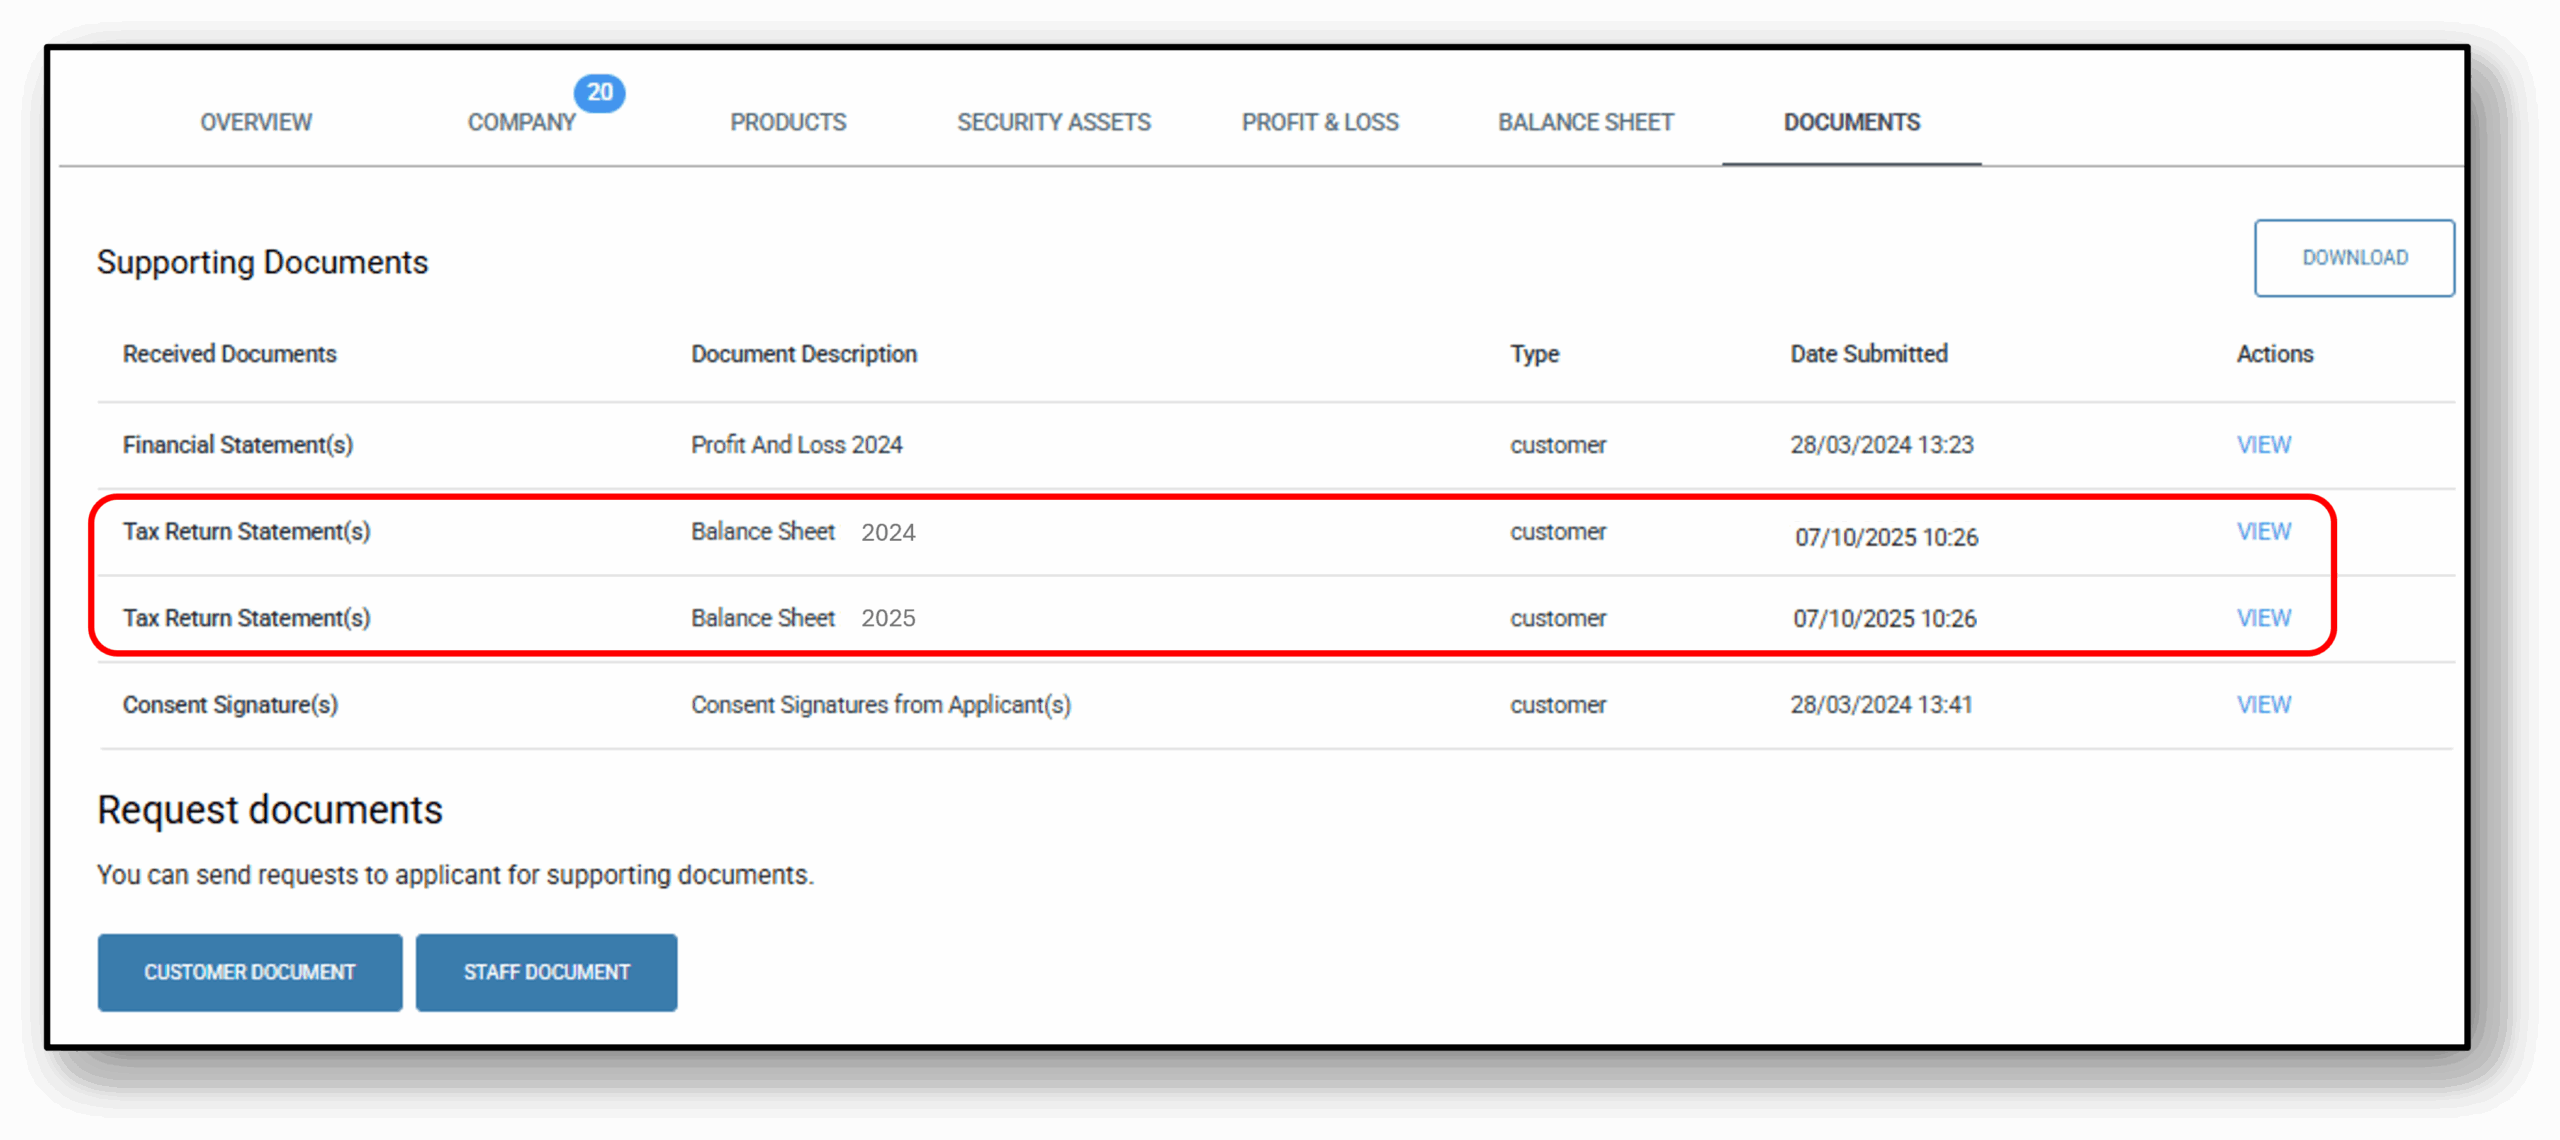
The tax Years on the balance sheet will be pre-populated once the businesses Tax returns are uploaded.  The user will see a breakdown of the following:

  1. Equity
    1. Retained Earnings
    2. Share Capitol
  2. Assets
    1. Current
    2. Non-Current Assets
  3. Liabilities
    1. Current
    2. Non-Current Liabilities
  4. Additional Assets
  5. Total Assets with additional assets

If the user needs to upload the businesses tax return/s, this can be completed through the ‘Documents’ tab.

3. Adding Additional Assets - Action/Edit/Delete

A user can edit additional assets that have been added for the business by scrolling down to the bottom of the balance sheet.

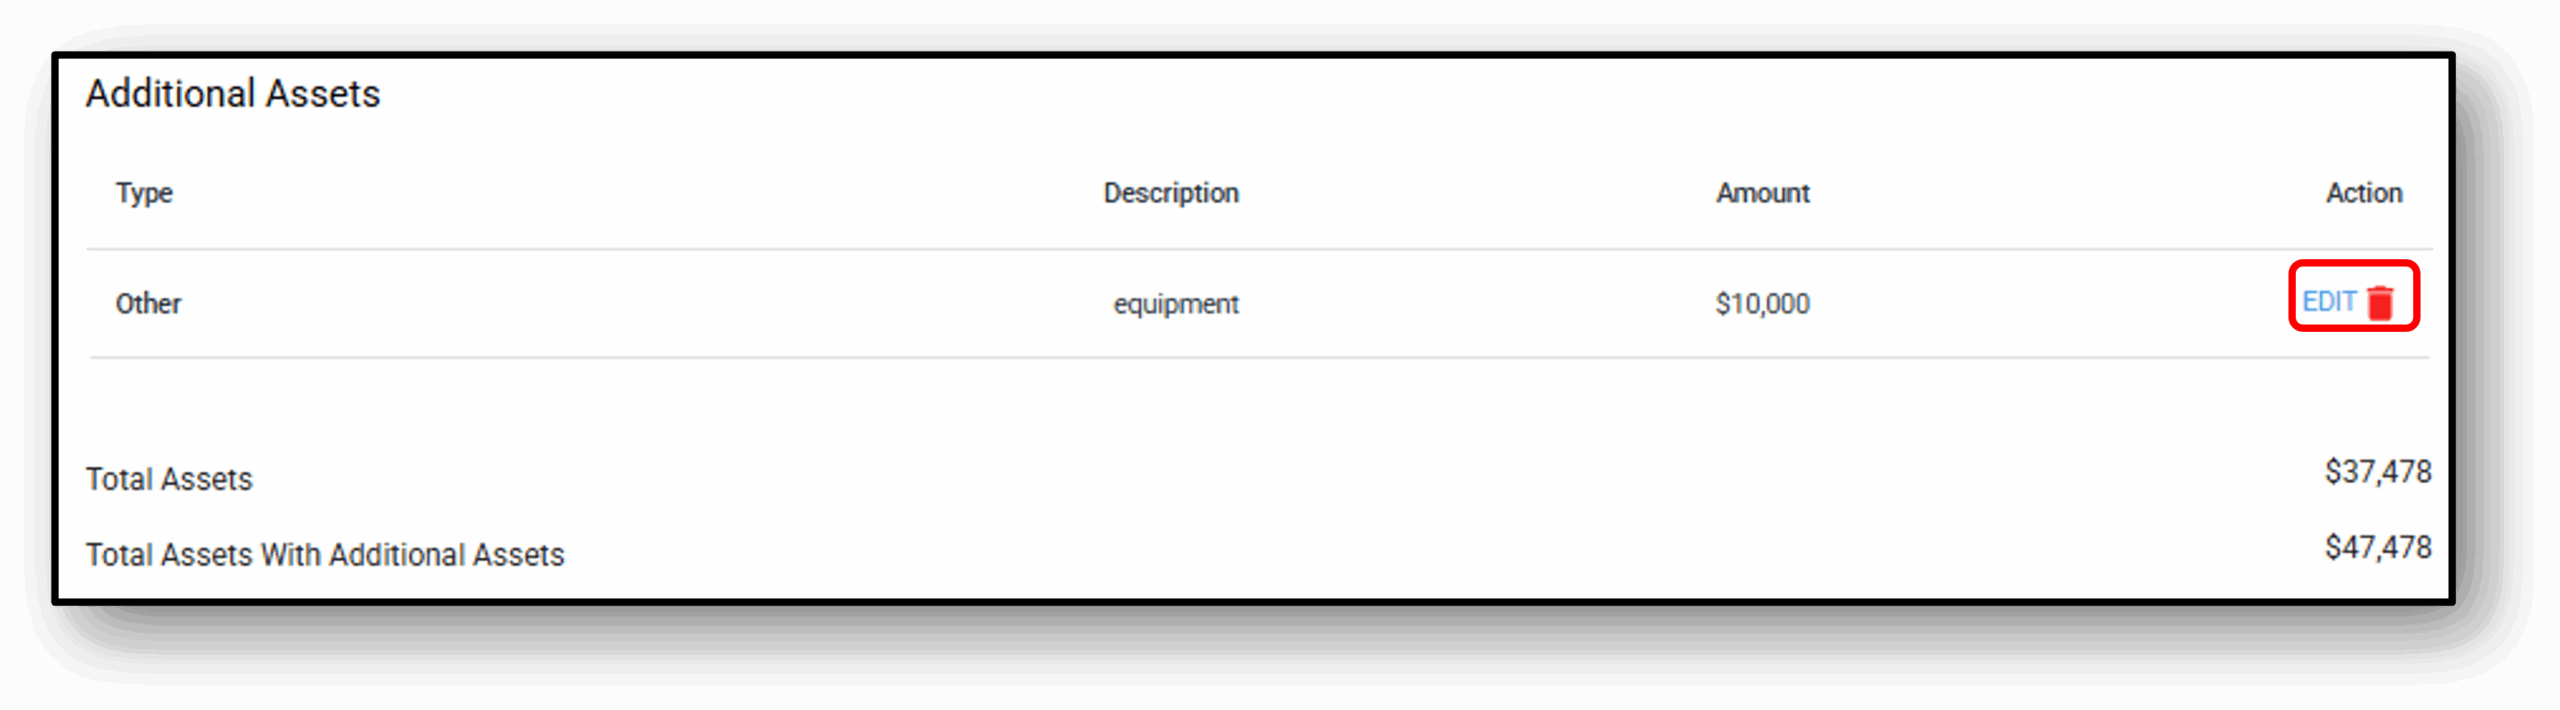
After selecting ‘edit’, the user will be presented with a similar screen to when they are asked to ‘add‘ an asset.


Frequenty Asked Questions

How do I edit the requirement of needing 2 years of financials for a business loan?

00:00: This workflow explains how to edit the business loan rule that mandates two years’ worth

00:04: of financials.

00:06: Click on the risk layer.

00:12: Then we should land on the assessment tab. Now

00:14: we just need to choose the right category.

00:17: Let’s select the business loan and click on edit.

00:19: So now we’re going to edit the assessment pipeline for a business loan.

00:23: We just find income employment item and expand the section by clicking on the drop-down arrow.

00:28: Then we scroll down to the very bottom of the items which actually mirrors the order of the form.

00:34: Here we can see the two years financials Is required and it’s mandatory so we can do a

00:38: couple of things here.

00:39: Click Ed

00:41: We can edit the requirement.

00:43: Click require

00:45: Now we can modify the requirement

00:47: Alternatively, we can simply remove the requirement altogether by clicking on the red

00:51: ‘Remove’ button. You can now see the form is updating successfully

00:55: in real-time down the bottom in green.

2. Question 2

Your content goes here. Edit or remove this text inline or in the module Content settings. You can also style every aspect of this content in the module Design settings and even apply custom CSS to this text in the module Advanced settings.

3. Question 3

Your content goes here. Edit or remove this text inline or in the module Content settings. You can also style every aspect of this content in the module Design settings and even apply custom CSS to this text in the module Advanced settings.

4. Question 4

Your content goes here. Edit or remove this text inline or in the module Content settings. You can also style every aspect of this content in the module Design settings and even apply custom CSS to this text in the module Advanced settings.

5. Question 5

Your content goes here. Edit or remove this text inline or in the module Content settings. You can also style every aspect of this content in the module Design settings and even apply custom CSS to this text in the module Advanced settings.

6. Question 6

Your content goes here. Edit or remove this text inline or in the module Content settings. You can also style every aspect of this content in the module Design settings and even apply custom CSS to this text in the module Advanced settings.